Copper etching selectively removes copper to create a pattern, recess, circuit geometry or complete thin-metal component. The term covers several different uses, from artistic plate etching and PCB fabrication to industrial photochemical machining of precision copper parts.
For engineering applications, the important variables are copper grade, material condition, thickness, feature geometry, required dimensional control, surface requirements and the removal method being used. This guide explains the main copper-etching methods and applications while separating industrial part manufacturing from decorative or workshop techniques.
Understanding Copper Etching
In copper etching, copper is slowly removed from a surface to make detailed designs or patterns. This old art form goes back to the time of the Egyptians and the Greeks. Copper etching was frequently used for decorative reasons, like adding detail to jewellery and building parts. Over time, it changed into a method that can be used in many fields, from fine art to manufacturing.
The basic idea behind copper etching is to remove copper from a surface in a controlled way using electricity or chemicals. Chemical etching usually involves putting a copper plate in an acidic solution. The acid breaks down only the exposed copper, leaving the desired image. On the other hand, electrochemical etching uses an electric current to do the same thing, giving you more accuracy and control over the process.
Accuracy and control are essential when etching copper because they decide how the design turns out. Whether they use chemical or electrical methods, artists must pay close attention to every detail in their etched designs to get the depth and complexity they want. The etching time, temperature, and the make-up of the etching fluid are all significant in deciding the result. Artists can use copper etching to make stunning works of art or precise industrial parts if they carefully plan and carry out their projects.
Tools and Materials
Before you start copper etching, you must have the right tools and supplies. Here is a list of the most essential parts that are required:
- Plates made of copper: Your etching job will be done on copper plates. Choose copper plates of good quality that have smooth surfaces and the correct width, which is usually between 16 and 22 gauge.
- How to do etching: You can pick from different etching solutions, like ferric chloride or ammonium persulfate, based on your project needs and personal taste. These chemicals break down copper in a specific way, making you make complex shapes. Make sure you have enough solution to cover the copper plates completely.
- Resist Materials: Some parts of the copper plate are kept safe from the etching solution by resist materials. Wax, vinyl, or exceptional printing grounds are all common choices. You should choose a resist material that sticks well to copper and won’t lift or smudge during the etching process.
- Etching Needles: You can’t eliminate resist material without etching needles. They let you see the copper surface below. Choose needles with fine tips for fine details and perfect control over your designs.
- Safety gear: People working with etching solutions and other poisons should prioritize safety. Protect yourself from harmful fumes and skin irritation by wearing the proper safety gear, such as gloves, goggles, and protected clothing.
Tips for Selecting Materials and Ensuring Safety
- Invest in high-quality materials for your etching projects to get the best results and last a long time. Cheaper options might make the quality of your work worse.
- When choosing etching solutions, you should consider things like concentration, how well they work, and how safe they are. Carefully read the labels on products and do what the makers say about how to handle and get rid of them.
- Put safety first by putting your workspace somewhere with good airflow that isn’t near food, drinks, kids, or pets. Learn how to handle etching tools properly and what to do in an emergency if something goes wrong.
Follow your local rules for adequately getting rid of hazardous trash when you’re done using etching solutions and other chemicals. You can start copper etching with confidence and imagination if you pick the right tools and materials and put safety first.
Techniques of Copper Etching
Copper etching includes several different methods, each with its pros and cons. Let’s look at three main ways to do this:
Etching the Old Way
In traditional etching, a preventive material like asphalt or wax is applied by hand to keep the etching solution from reaching certain parts of a copper plate. Then, artists use etching needles or other tools to carefully remove the resist, which shows the copper surface below. The plate is then put into an etching solution, dissolving the copper showing. This leaves the pattern that was wanted.
Advantages
- gives you direct control over the etching process and a hands-on method.
- It works well for making complex patterns and tiny details.
- It needs very little gear and can be done without special machines.
Challenges
- It requires skill and practice to get the same results every time.
- It takes a lot of time, especially for larger patterns.
- The process is too manual to make it easy to scale up for mass production.
Photochemical Etching
To create a resist design on a copper plate, photochemical etching uses light-sensitive emulsions, films, or other photosensitive materials. The images are put on a transparency or photographic negative by the artist, then put on top of the coated plate and lit up. The plate is developed and washed to remove the resist material that hasn’t been exposed. This leaves the image that was wanted behind. Once the copper is gone, the plate is etched in a chemical solution.
Advantages
- It makes it possible to copy complex designs exactly from digital or hand-drawn sources.
- It’s more consistent and more accessible to use again and again than traditional ways.
- Excellent for making prints and copies of good quality.
Challenges
- Needs access to unique tools, like a UV light source and chemicals for development.
- It may cost more to set up at first than with standard etching.
- There are not many options for changing things during the cutting process.
Electrochemical Etching
An electric current is used specifically in electrochemical etching to remove copper from a plate. Artists use masking or photoresist processes, among other things, to make a resist pattern on the copper surface. After putting the plate in an electrolyte solution, an electric current is run through it. This dissolves the copper that is showing.
Advantages
- Allows for exact control over the etching process, which leads to consistent results.
- Suitable for making designs with lots of sharp lines and minor features.
- It can be scaled up for large-scale production in factories.
Challenges
- Needs specialized tools, like power sources and electrolyte solutions.
- Some artists may be unable to afford the initial setup prices and technical know-how.
- Safety issues, such as handling corrosive liquids and electrical risks, must be considered.
Etching techniques are different, so artists can pick the one that works best for them based on their tastes, skills, and project needs. You need to be dedicated, ready to try new things, and open to new techniques to master the art of copper etching, whether you want to stick to traditional methods or embrace modern technology.
Step-by-Step Guide to Copper Etching
Preparation
- First, clean your copper plate well to eliminate any dust, grease, or rust that could stop the etching process. Clear the surface of any dirt or dust by using a light abrasive or solvent.
- Ensure the copper plate is flat and smooth as you cut it to the desired size and shape.
- Use a brush or roller to put a thin layer of resist material on one side of the copper plate. This could be wax or vinyl. Ensure that there are no gaps or bubbles in the resist and that it covers the whole area evenly.
Design Transfer
- Use tracing paper or a transfer pen to put your image on the resist material. You could also make a digital drawing and print it on a transparency to etch it with photochemical.
- Place the image on top of the resist-coated copper plate, and use masking tape or weights to hold it.
- Make sure the lines on the resist material are clear and straight by tracing the design with an etching needle or another sharp tool.
Etching
- Follow the manufacturer’s directions to make your etching solution, diluting it to the correct concentration.
- Make sure the copper plate is fully buried in the etching solution. Gently move the plate around to help it etch evenly.
- Keep a close eye on the etching process and use a magnifying glass or ruler to check the depth of the etching every so often. Change the etching time until you get the results you want.
- Connect the cathode, commonly stainless steel, to the negative terminal of a power supply and the copper plate to the positive terminal. Put the plate in the electrolyte solution and change the current density to change how fast the plate is etched.
Cleaning
- After the etching, remove the copper plate from the solution and rinse it well with water to stop the chemical reaction.
- Alcohol or acetone can be used as a cleaner to remove the resist material on the copper plate. You could also slightly heat the plate to get rid of the resistance.
- To remove any last bits of food, rinse the plate with water and dry it with a clean cloth or paper towel.
Finishing
- The carved copper plate can be cleaned, polished, or treated to make it look better. This could mean buffing with a polishing substance or adding a patina to make it look old.
- Look over the finished etching for flaws or variations, and fix or touch up anything that needs it.
Practical Tips and Troubleshooting
- Try using different etching solutions and resist materials until you find the one that gives you the desired results.
- Please write down the concentration of the etching solution, the time it takes to etch, and any other variables important to your tests.
- If the etching isn’t going smoothly, stir the solution more quickly or change the temperature to help the chemicals react better.
- When you’re etching, be patient and orderly because getting the desired results may take more than one try and change.
- When working with etching chemicals, you should always wear safety gear, like gloves and masks, to keep yourself safe.
Applications of Copper Etching
Copper etching is used in a wide range of businesses, showing off its unique qualities and aesthetic appeal:
Art
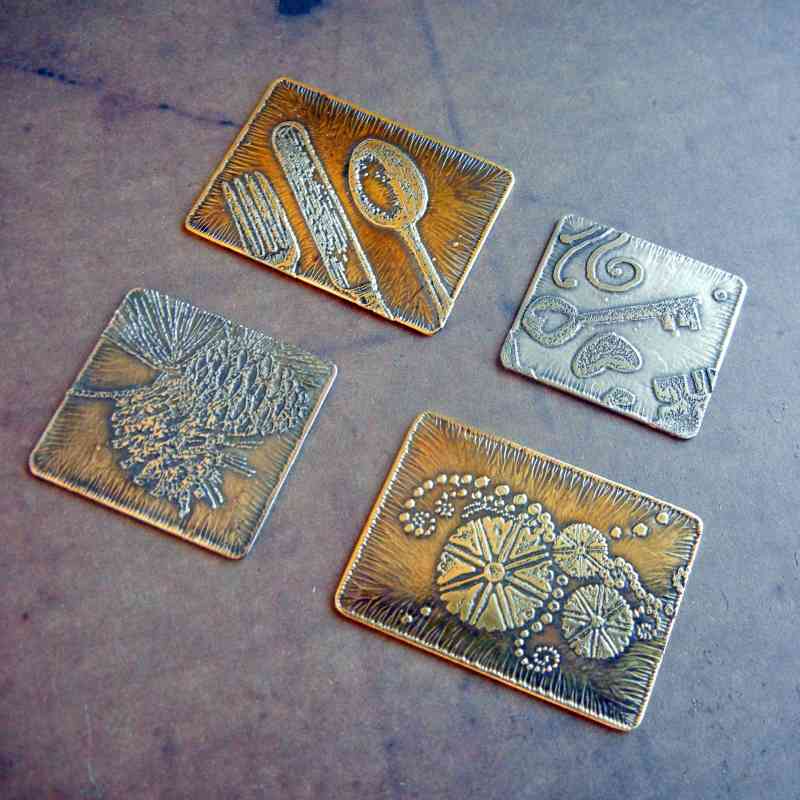
For a long time, copper etching has been a favourite way for artists and printmakers to make detailed prints, carvings, and drawings. By etching, artists can get excellent details and depth, making them make beautiful works with exciting textures and looks.
Jewellery Making
Jewellery designers often use Etched copper to give their pieces more depth and personality. Etching can add detailed designs and patterns to bracelets, earrings, and pendants, making them look better and increasing their value.
Electronics
In electronics, copper etching is a critical step in making printed circuit boards ( PCBs), which are the building blocks of electronics like computers, smartphones, and TVs. Copper can be precisely removed through etching to make circuit traces and pads, which let electrical currents run and make electronic parts work.
Things for decoration
Etched copper can be used to decorate many things for decoration, like pots, bowls, and ornaments. Copper etching is very flexible, so it can make patterns that fit any style. This adds a touch of class and elegance to home decor.
Etched copper is a unique material sought after in many fields because it is durable, can be used in many ways, and looks good. Copper etching continues to spark creativity and new ideas, pushing the limits of design and craftsmanship in everything from fine art to industrial manufacturing. Copper etching is a great way to show creativity and learn more about art. It can make complicated prints, stylish jewellery, or valuable electronic parts.
Conclusion
Copper etching can refer to very different processes, so the correct method should be selected from the required result. Artistic surface work, PCB trace formation, electrochemical removal and photochemical production of thin copper components have different equipment, quality controls and design constraints.
For industrial copper parts, start with the drawing and specify the copper grade, material thickness, critical dimensions, tolerance requirements and any forming, plating or inspection needs. See the Copper Etching Services page and Photochemical Machining guide for manufacturing-focused information.

- What Can a Pilot Lot Actually Prove About Etched-Part Repeatability? - October 9, 2026
- How Much Open Area Remains After an Acoustic Mesh Is Assembled? - October 8, 2026
- How Do You Compare Etched Prototypes Without Losing Track of the Design? - October 7, 2026