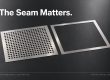
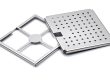
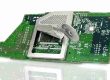
PCB shielding cans are thin metal enclosures used to control electromagnetic interference around sensitive components, RF sections and high-speed circuitry. Their manufacturing requirements often include tight package space, ventilation openings, mounting tabs, fold lines and frequent design revisions during product development.
Photochemical etching is useful for these flat shielding patterns because it can create complex cutouts and tab geometry without hard stamping tooling. The etched blank can then be formed, plated or assembled to suit the final PCB enclosure design.
This guide focuses on the manufacturing and DFM side of custom PCB shielding cans: material selection, flat-pattern design, etching, forming, inspection and the information a supplier needs to review before production.
Understanding PCB Shielding Cans.
PCB shielding cans are metallic enclosures that encase sensitive electronic components on a printed circuit board ( PCB). Their primary role is to minimize electromagnetic interference (EMI) by blocking and containing electromagnetic emissions, ensuring that the components within the shielded area operate without external disruptions.
Importance
Using shielding cans in electronic design is crucial for optimal device performance and reliability. These cans help prevent signal degradation, cross-talk between components, and potential malfunctions by reducing EMI. This results in improved functionality and longevity of the electronic device, making it more robust and reliable in various environments.
Types
Several types of PCB shielding cans, including one-piece and two-piece shields, offer different levels of accessibility and protection. One-piece shields are more spartan and provide continuous EMI protection, while two-piece shields allow for easier inspection and rework. These cans are used in various applications, from consumer electronics to aerospace systems, wherever reliable EMI shielding is necessary.


Materials and Tools Needed
Materials
To custom etch PCB shielding cans, you’ll need the following materials:
- Metal Sheets:Copper or aluminum sheets are chosen for their excellent EMI shielding properties.
- Etching Chemicals: Ferric chloride or another suitable etching solution to remove unprotected metal.
- Photoresist:A material to transfer your design onto the metal sheet, protecting areas that should remain intact during etching.
- Protective Coating:To protect the finished shield from oxidation and environmental damage.
Tools
The tools required for this process include:
- Design Software:Programs like AutoCAD or Eagle to create precise layouts of the shielding cans.
- Laser Cutter: This is for accurately cutting the metal sheet according to your design.
- Etching Tank: A container to hold the etching solution and the metal sheet during the etching process.
- Protective Gear:Safety goggles, gloves, and aprons to ensure safe handling of chemicals and tools.
- Cleaning Supplies: Brushes and rinsing stations clean the etched shielding cans afterward.


Design Considerations
Design Software
Design software like AutoCAD or Eagle can be used to create precise PCB shielding layouts. These tools offer advanced features for detailed and accurate designs, ensuring your shielding cans fit perfectly on the PCB.
Design Tips
When designing your shielding cans, consider the following:
- Dimensions:Ensure the can’s dimensions accommodate the components it will shield without being too bulky. Measure the height, width, and depth accurately.
- Cutouts:Include cutouts for connectors, ventilation, and access points. Proper placement of these cutouts is crucial to maintaining EMI protection while allowing necessary connections and airflow.
- Mounting Tabs:Design mounting tabs for secure attachment to the PCB. Tabs should be positioned to provide stability without interfering with other components.
Testing
Design your shielding cans for easy testing and assembly. Ensure the cans can be easily removed and reattached for testing and maintenance. This design flexibility allows for effective EMI testing and quality control checks, ensuring optimal performance of the shielded components.
Etching Process
Step-by-Step Guide
Preparation
- Clean the Metal Sheet:Thoroughly clean the copper or aluminum sheet to remove any oils or contaminants. Use a mild abrasive cleaner and rinse with distilled water.
- Apply Photoresist:Coat the cleaned metal sheet with a photoresist material. You can do this by laminating a dry film photoresist or applying a liquid photoresist evenly.
- Transfer the Design:Use a UV light source to expose the photoresist-covered metal sheet with your design. The design should be printed on a transparent film. After exposure, the photoresist is developed by immersing the sheet in a developer solution, revealing the pattern on the metal.
Etching
- Prepare the Etching Solution:Fill an etching tank with ferric chloride or another suitable etching chemical. Ensure the tank is in a well-ventilated area.
- Etching Process: Immerse the metal sheet in the etching solution. Wear protective gloves and goggles to handle the chemicals safely. Agitate the solution periodically to ensure even etching. Monitor the progress closely; the etching time will vary depending on the metal’s thickness and the solution’s strength.
- Remove the Metal Sheet:Carefully remove the sheet from the solution once the unwanted metal is etched away.
Cleaning
- Rinse Thoroughly: Rinse the etched metal sheet with water to stop the chemical reaction. Use a brush to gently remove any residual photoresist.
- Inspect the Etched Cans:Check the etched shielding cans for defects or incomplete etching. Ensure the design is accurately transferred and all unwanted metal is removed.
Safety Tips
- Protective Gear:Always wear safety goggles, gloves, and an apron to protect yourself from chemical splashes.
- Ventilation: Work in a well-ventilated area to avoid inhaling fumes from the etching chemicals.
- Chemical Disposal:Dispose of used chemicals according to local regulations. Do not pour them down the drain.
- Emergency Preparedness:Have a neutralizing agent (such as baking soda) and plenty of water on hand in case of spills.
Finishing and Assembly
Finishing Touches
After etching, deburr any sharp edges on the shielding cans using a deburring tool or sandpaper. This step ensures a smooth and safe finish. Apply a protective coating, such as a conformal coating or a layer of clear lacquer, to prevent oxidation and environmental damage.
Assembly
To assemble the shielding cans onto the PCB, you can solder them directly onto the board using a soldering iron and solder, ensuring a secure electrical connection. Alternatively, clips or fasteners designed for PCB shielding cans can be used for a removable and rework-friendly assembly method.


Testing and Quality Control
Testing Methods
Conduct EMI testing to evaluate the effectiveness of the shielding cans in reducing electromagnetic interference. EMI test equipment measures the attenuation of electromagnetic signals within and outside the shielded area. Also, thermal performance checks should ensure that the shielding cans do not cause overheating of enclosed components.
Quality Control
Implement rigorous quality control measures to ensure the shielding cans meet design specifications and performance standards. This includes visual inspections for defects, dimensional checks to verify fitment and functional testing to validate EMI shielding effectiveness. Adhering to quality control protocols ensures the reliability and performance of the shielding cans in real-world applications.
Conclusion
Custom PCB shielding cans are a good fit for photochemical etching when the flat blank contains complex cutouts, tabs, ventilation, fold lines or frequent design revisions. Final EMI performance depends on the complete enclosure, grounding, material, plating and assembly—not on the etching process alone.
For related guidance, see Photochemical Etching for PCB EMI Shielding and Photo Etched EMI Shielding Sheets. For an RFQ, provide the flat pattern or formed-part drawing with material, thickness, bend details, plating requirements, critical dimensions and quantity.

- What Can a Pilot Lot Actually Prove About Etched-Part Repeatability? - October 9, 2026
- How Much Open Area Remains After an Acoustic Mesh Is Assembled? - October 8, 2026
- How Do You Compare Etched Prototypes Without Losing Track of the Design? - October 7, 2026