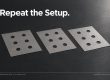
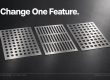
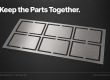
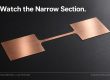
Photo-etched electric shaver foils and metal guards are thin precision components that control hair entry, protect the cutting system and influence airflow around the cutter assembly. For OEM development, the engineering challenge is very different from customizing a plastic trimming comb: the metal component must match the cutter geometry, maintain repeatable openings, survive forming and assembly, and meet surface and edge requirements that affect both performance and user contact.
Photochemical etching is useful for these parts because dense slot or hole patterns can be produced without mechanical punching forces. The drawing should define the material, thickness, aperture geometry, open area, formed shape, mounting features and any surface treatment or inspection requirement before production.
Understanding Electric Shaver Guards
In this article, the focus is on the thin metal foil or protective guard positioned around the cutting system, not the removable plastic comb used to set beard length. The etched metal part may contain dense slots, holes or repeated cutting-window geometry and can also include tabs, locating features or areas that are later formed. Its design must be coordinated with the cutter, housing and assembly so that geometry, stiffness, airflow and user-contact surfaces remain consistent.
Tools and Materials Needed
To customize an electric shaver guard, you’ll need a few essential tools and materials:
- Measuring Tools:These include a ruler or callipers to accurately measure the dimensions of your shaver and existing guard.
- Cutting Tools:Depending on the material (e.g., plastic or metal), you may need scissors, a utility knife, or metal shears.
- Sanding Tools:Emery cloth or sandpaper to smooth out rough edges after cutting.
- Safety Equipment:To ensure safety, gloves and eye protection when working with sharp tools or materials.
These tools and materials can often be found at hardware stores or online retailers specializing in DIY supplies. Ensuring you have the right equipment before starting your customization project will help you achieve professional-looking results and ensure safety throughout the process.
Steps to Customizing an Electric Shaver Guard
Step 1: Planning and Design
Before starting your customization project, it’s essential to plan and design your electric shaver guard:
- Measure your electric shaver and existing guard:Use a ruler or callipers to accurately measure the dimensions of both your shaver and its current guard.
- Sketch your design:Based on your measurements, sketch the modifications you want to make. Consider the desired length or shape adjustments.
Step 2: Selecting the Material
Choosing the suitable material is crucial for the functionality and durability of your custom shaver guard:
- Discuss different materials:Consider materials like plastic or metal. Plastic is lightweight and easy to work with, while metal offers durability but requires more effort to cut.
- Pros and cons:Plastic is typically easier to shape and less expensive but may wear out faster. Metal guards are more durable but may require specialized tools for cutting.
- Choose based on your design:Select a material that aligns with your design goals and personal preferences.
Step 3: Cutting and Shaping the Guard
Now, let’s move on to cutting and shaping your chosen material:
- Detailed cutting instructions:Use appropriate tools such as scissors, utility knives, or metal shears to cut the material to your desired shape and size.
- Precision tips:Mark your cutting lines carefully and slowly to avoid mistakes. Measure twice cut once.
- Avoid common mistakes:Ensure your tools are sharp and suitable for the material to prevent uneven edges or damage.
Step 4: Smoothing and Finishing
Achieve a professional finish for your custom shaver guard:
- Sanding and smoothing:Use an emery cloth or sandpaper to smooth out any rough edges or burrs left from cutting.
- Tips for a professional finish:Work gradually with finer grits of sandpaper for a smooth surface. Pay attention to detail to ensure comfort during use.
Step 5: Fitting and Testing
Ensure your custom shaver guard fits perfectly and functions well:
- Proper fitting:Carefully fit your custom guard onto the shaver. Ensure it aligns correctly with the shaver head and securely attaches.
- Testing for comfort and functionality:Test the shaver with the custom guard attached. Ensure it provides the desired cutting length and feels comfortable during use.
- Adjustments: If necessary, make minor adjustments based on your testing to improve fit or performance.
Customization Ideas and Tips
Enhance your custom shaver guard with these creative ideas and practical tips:
- Creative customization:Add grips or textured surfaces to improve handling and control.
- Personalized designs:Customize your guard with patterns or colors that reflect your style.
- Maintenance tips: Regularly clean your custom guard to prevent hair buildup and maintain optimal performance.
- Additional features:Explore options like adjustable length settings or ergonomic designs to enhance your grooming experience further.
Common Challenges and Solutions
Navigate potential challenges when customizing your shaver guard:
- Potential challenges:Difficulty accurately measuring or cutting the material, achieving a smooth finish, or ensuring a secure fit.
- Practical solutions:Double-check measurements before cutting, use the right tools for the material, and take your time to avoid mistakes.
- Troubleshooting tips:If the guard doesn’t fit or perform as expected, reassess measurements and adjust accordingly.
- Avoiding pitfalls:Plan thoroughly, follow step-by-step instructions, and seek guidance to overcome common customization hurdles.
Conclusion
For a custom shaver foil or metal guard, the key inputs are the actual cutter interface and engineering drawing—not consumer trimming preferences. Material, thickness, aperture geometry, open area, formed profile, mounting features, surface condition and inspection requirements should be reviewed as one system.
Send Xinketching the metal-foil or guard drawing for a DFM review. We can assess whether photochemical etching is suitable, identify geometry that may require special control and confirm the manufacturing approach before prototype or production.

- What Can a Pilot Lot Actually Prove About Etched-Part Repeatability? - October 9, 2026
- How Much Open Area Remains After an Acoustic Mesh Is Assembled? - October 8, 2026
- How Do You Compare Etched Prototypes Without Losing Track of the Design? - October 7, 2026